Posts

Showing posts with the label beginner

Manage existing resources via Helm

Manage existing resources via Helm Helm is really a very powerful tool for managing Kubernetes objects. With a single command, we can install or upgrade multiple related Kubernetes entities. Let's say we want to install any chart from the helm registry, we just need to type in the below command and helm will do the heavy lifting for us. $ helm install [RELEASE_NAME] [REPO]/[CHART] But below post is not about the basics of helm or how to install or upgrade a chart, etc. It's been a long time since I wrote anything, so I just thought to write something about what new I learned today :)  While installing one of my charts, I encountered below issue: Error: INSTALLATION FAILED: rendered manifests contain a resource that already exists. Unable to continue with install: StorageClass "demo-sc" in namespace "" exists and cannot be imported into the current release: invalid ownership metadata; label validation error: missing key "app.kubernetes.io/managed-by...
Study Splunk

Want to learn about Splunk,  Click here ! https://studysplunk.blogspot.com/  What does above blog contains?  What is Splunk? Splunk Enterprise Components? Installing Splunk? Installing Splunk Universal Forwarder? Walkthrough of Splunk Interface Search Modes Searching in Splunk #1 Splunk sub(commands) [top, rare, fields, table, rename, sort] #2 Splunk sub(commands) [eval, trim, chart, showperc, stats, avg] #3 Splunk sub(commands) [eval, round, trim, stats, ceil, exact, floor, tostring] #4 Splunk sub(commands) [timechart, geostats, iplocation] #5 Splunk sub(Commands) [sendemail, dedup, eval, concatenate, new_field] #6 Splunk sub(Commands) [fields, rename, replace, table, transaction] Bringing data into Splunk Bringing data into Splunk (Continued...) Enable receiving port on Splunk server Dealing with Time Still I am in a process of writing couple of more topics related to Splunk, but you can go thru any of the links given above !! D...

Study Puppet

Want to learn about Puppet,  Click here ! https://managepuppet.blogspot.com What does above blog contains?  Introduction to Puppet puppet resource??? puppet apply??? puppet describe??? puppet agent??? puppet cert??? Un-revoke the revoked certificate in Puppet puppet master??? Puppet modules??? Facter??? Puppet installation on agent/server Creating a module in Puppet Dry run in Puppet --noop Puppet agent run Exec in Puppet Though it is still in progress....

Installing Tomcat8 on RHEL6

Image
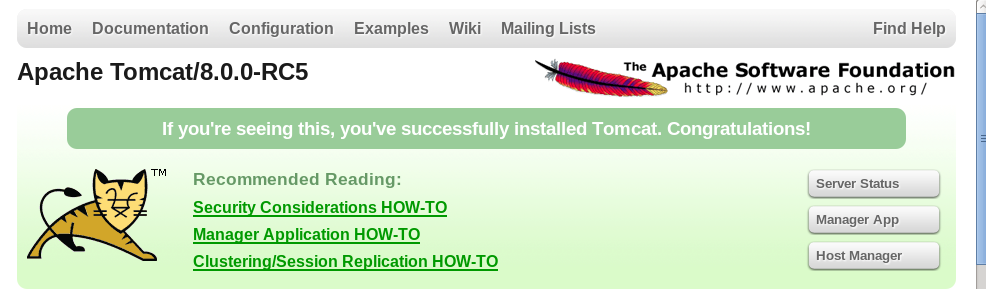
Apache-HTTP v/s Apache-Tomcat: The basic difference is Apache-Tomcat is written in Java but Apache-HTTP is written in C. Apart from this Apache-Tomcat is used as a webserver as well as to deploy Java Servlet's and JSP's [Java server pages] so basically Apache-Tomcat is used to serve Java Technologies whereas Apache-HTTP is used to serve HTTP. Prerequisites: Appropriate version of JRE [Java run-time environment] for instance jre1.7 is required to run tomcat-8[.X.X]. Tomcat binaries, for version 8 check this link . Sudo/Root access to the machine. Step1: Install JRE Download JRE from Java's official website. You can keep Java at any location but for my ease I have kept both Tomcat and Java in /opt. # cd /opt # cp jre-7u45-linux-x64.tar.gz . # tar -zxvf jre-7u45-linux-x64.tar.gz  The above command will create a folder with JRE binaries. In my case it was "jre1.7.0_45". Now set JRE_HOME [Required by Tomcat] and PATH. export JRE_HOME=/opt/jre1.7....

Some important commands

# Find CPU specifications cat /proc/cpuinfo # System information via uname: uname -r [Kernel release] uname -a [All information about the kernal] uname -s [Kernel name] uname -m [Machine hw name] uname -p [Processor type] uname -o [OS] uname -n [Node name] # Running kernel and compiler: cat /proc/version # X server version: X -showconfig or Xorg -version # List of Kernel modules loaded: lsmod # Memory and swap information cat /proc/meminfo free free -m [in MB] # Hard drives information: fdisk -l # Free/used drive space or mount points: df -h # Distribution ?? cat /etc/issue cat /etc/issue.net # Finding or locating files find locate which whereis # Log messages as they happen: tail -f /var/log/messages (shows last 10 lines). # What processes are running [concise information]: ps -A ps -A | grep <PROCESS_NAME/PID> [For specific process] # What process are running [Brief information]: ps -ef ps -ef | grep -i <PROCESS_NAME/PID...

Ways of searching a disk/hdd in RHEL6

There must be an entry in /sys/block/XXX # ls -lrt /sys/block/ /proc/partitions ==> cat /proc/partitions  major minor  #blocks  name    8        0   15728640 sda    8        1     512000 sda1    8        2   15215616 sda2    8       16    2097152 sdb  253        0   13148160 dm-0  253        1    2064384 dm-1 To list all the disk in the machine ==> fdisk -l # fdisk -l /dev/?d? To avoid all the dm devices. # fdisk -l 2>/dev/null | grep "Disk \/" Disk /dev/sda: 16.1 GB, 16106127360 bytes Disk /dev/sdb: 2147 MB, 2147483648 bytes Disk /dev/mapper/VolGroup-lv_root: 13.5 GB, 13463715840 bytes Disk /dev/mapper/VolGroup-lv_swap: 2113 MB, 2113929216 bytes # lsblk NAME                   ...

NIC Bonding/Teaming in RHEL6

NIC [network interface card] bonding is a term used to describe a way to increase available bandwidth.  Bonding is nothing but Linux kernel feature[aka BONDING] that allows to aggregate multiple like interfaces (such as eth0, eth1, eth2 etc) into a single virtual link. This is done to get higher data rates and as well as link failover. NIC bonding may also be called as NIC Teaming. Here we will create a bond called bond0 , number of ether-net's used are two [ eth0 and eth1 ]. Step 1: Create a bond0 file==> # vim /etc/sysconfig/network-scripts/ifcfg-bond0 Append the file with below information and save the file==> DEVICE=bond0 IPADDR=192.168.57.150 NETMASK=255.255.255.0 USERCTL=no BOOTPROTO=none ONBOOT=yes Note: IP and Netmask needs to be replaced as per your network configuration. Step 2:  Edit ifcfg-eth0 ==> # vim /etc/sysconfig/network-scripts/ifcfg-eth0  Append the details as follows ==>  DEVICE=eth0 ONBOOT=yes ...

Configuration and setting-up of AIDE on RHEL6

AIDE is a powerful package for checking integrity of files on a machine/system. Prerequisites : Just aide package. [root@sunny ~]# yum install aide -y Loaded plugins: refresh-packagekit, rhnplugin This system is not registered with RHN.                                                                         RHN support will be disabled. Setting up Install Process Resolving Dependencies --> Running transaction check ---> Package aide.x86_64 0:0.14-3.el6 set to be updated --> Finished Dependency Resolution Dependencies Resolved ====================================================================...

Configuring VNC on RHEL6

Purpose: The purpose of this document is to show client and server configuration of vnc. On Server Side, Install required software like tigervnc-server: [admin@sunny ~]$ su - Password: [Enter your root password] [root@sunny ~]# yum install tigervnc-server -y Loaded plugins: refresh-packagekit, rhnplugin This system is not registered with RHN. RHN support will be disabled. Setting up Install Process Resolving Dependencies --> Running transaction check ---> Package tigervnc-server.x86_64 0:1.0.90-0.10.20100115svn3945.el6 set to be updated --> Finished Dependency Resolution Dependencies Resolved ======================================================================== Package Arch Version Repository Size ======================================================================== Installing: tigervnc-server x86_64 1.0.90-0.10.20100115svn3945.el6 local 1.0 M Transaction Summary =============================================...

Password less SSH login (ssh-keygen)

Image
SSH is often used to login from one machine to another machine, There are number of methods to achieve this but mostly in every method it requires authentication..... It also does requires authentication but for one time only i.e. for the first time you need to do a setup and for rest of the times when you will try to login via ssh it will not ask for any password. For achieving this you just need to generate your own personal set of private/public key pair. ssh-keygen is used to generate that key pair for you. A HOWTO for generating your own private/public key pair is given below: Firstly generate your private/public key pair by following command: [admin@sunny Desktop]$ ssh-keygen -t rsa Generating public/private rsa key pair. Enter file in which to save the key (/home/admin/.ssh/id_rsa): [Press enter if you want to save your keys to default location] Enter passphrase (empty for no passphrase): [Enter your passphrase]  Enter same passphrase again:  [E...

Nagios on RHEL 6

Image
Installing EPEL Repository Download epel release repo from below URL: [root@]$ wget -c  http://ftp.jaist.ac.jp/pub/Linux/Fedora/epel/6/i386/epel-release-6-7.noarch.rpm If in case you are using RHEL5 you can download this epel-release from below URL: http://download.fedoraproject.org/pub/epel/5/i386/epel-release-5-4.noarch.rpm Installing pre-requisites packages Install the pre-requisites software’s like: · Php · Gcc, Gcc++ · Httpd · Gd · Perl [root@]$yum install php gcc* httpd gd perl –y Installing Nagios and some additional packages Install major packages like: · Nagios · Nagios-common · Nagios-plugins · And some basic plugins like nagios-plugins-ping, nagios plugins-http, nagios-plugins-disk etc. [root@]$yum install nagios nagios-common nagios-plugins nagios-plugins-http nagios-plugins-disk nagios-plugins-ping -y Major configuration files To configure Nagios, you first need to fin...

Samba Server on RHEL6

How to make a Samba Server on RHEL6 Task to be performed on Linux Box: Install Samba packages in your machine by yum command: [root@sunny ~]$ yum install samba* -y Open Samba's configuration file: [root@sunny ~]$ vi /etc/samba/smb.conf # at line 58 add the following unix charset = UTF-8 dos charset = CP932 # at line 75 change to the windows workgroup. workgroup =  WORKGROUP # at line 81 uncomment and change the ip addresses. hosts allow = 127. 192.168.  (127 is for local host and your machine virtual ip if you are using a VM). # at line 102 change the parameters. security = user [root@sunny ~]$ vi /etc/sysconfig/iptables Add the line at the last before commit. -A INPUT -i vmnet6 -j ACCEPT   (If using VMPlayer). -A INPUT -i virbr0 -j ACCEPT (If using Virt-Manager). (The values of vmnet6 and virbr0 may change as per your machine's config.). Restart service iptables: [root@sunny ~]$ service iptables restart Enable sharing ...